Salesforce integration with Level AI
Last updated: November 5, 2026
You can import your Salesforce customer conversations into Level AI to gain valuable insights. With the Salesforce–Level AI integration, conversations are ingested from your Salesforce org into Level AI on a periodic schedule. You can connect more than one Salesforce account, and configure and enable each one separately.
INFO
The Salesforce integration supports ingesting conversations for the Email, Chat, Messaging Session, and Voice Call channels. For any other channel, contact your Technical Account Manager.
Before you start
Level AI: an Admin login with access to Settings > Integrations.
Salesforce credentials: choose one authentication method.
External Client App (recommended): create an External Client App in Salesforce and copy its Consumer Key, Consumer Secret, and Domain URL. Follow Salesforce Integration: External Client App Authentication Setup first.
OAuth: sign in to Salesforce interactively as an Admin, or as a user with Read and View All Records permissions on these objects:
Case
VoiceCall
MessagingSession
LiveChatTranscript
ConversationEntry
EmailMessage
Opportunity (the OpportunityId field must be readable)
Lead (the LeadId field must be readable)
Account (the EndUserAccountId field must be readable)
Step 1: Connect a Salesforce account
Log in to your Level AI tenant as an Admin.
In the left sidebar, go to Settings > Integrations, open the CCaaS & CRM tab, and select the Salesforce card. The Salesforce Account Management page opens.
Select Add Account. The authentication window opens with two tabs: External Client App and OAuth.
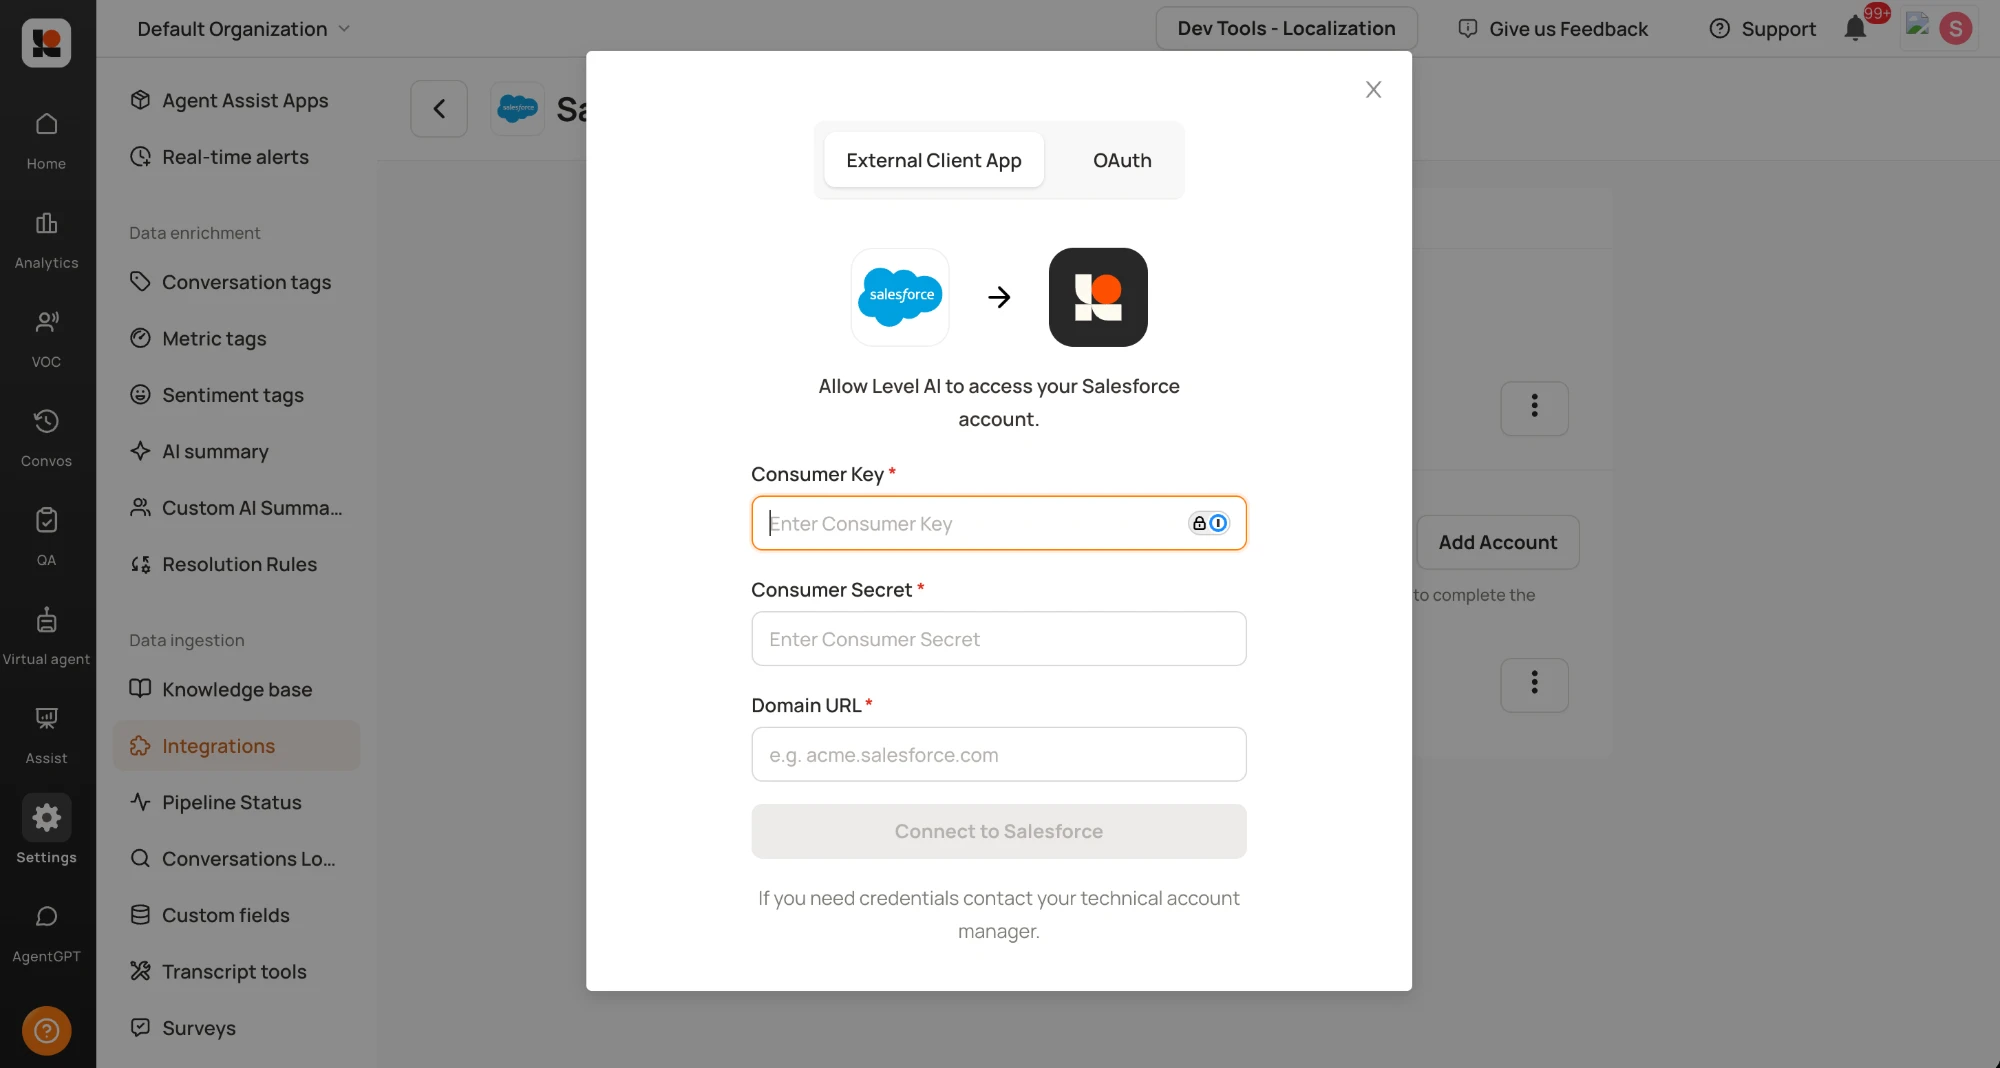
Authenticate using one of the tabs:
External Client App: enter the Consumer Key, Consumer Secret, and Domain URL (for example acme.salesforce.com) from your External Client App, then select Connect to Salesforce. The button stays disabled until all three fields are filled. If you don't have these values yet, see Salesforce Integration: External Client App Authentication Setup.
OAuth: select the OAuth tab and continue to the Salesforce login page. Log in with a user that has the permissions listed under Before you start.
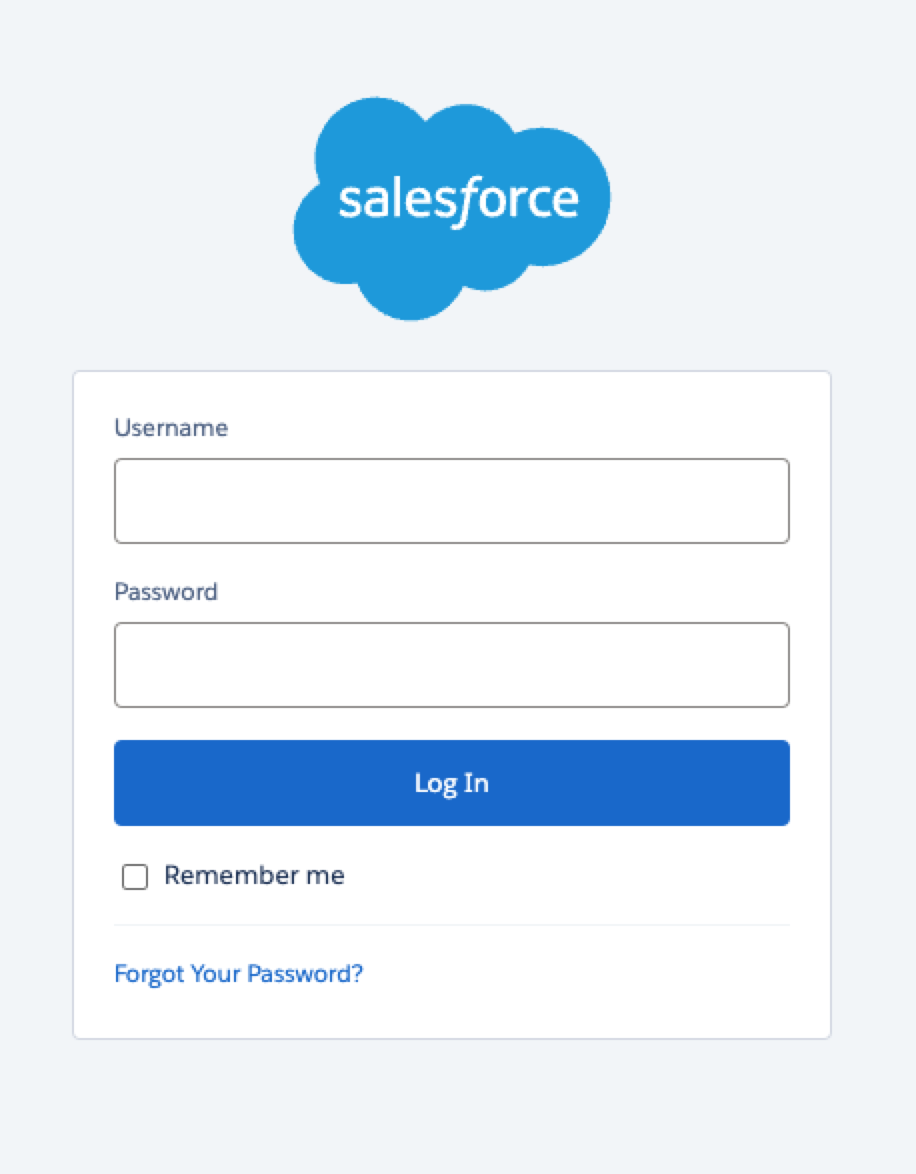
After successful authentication, the account appears under Connected Accounts on the Salesforce Account Management page. A connected account does not import data until you configure and enable it.
Step 2: Choose channels
Under Connected Accounts, select the account to complete its setup. The Salesforce Integration page opens.
Under New integrations, select the channel you want to import, for example Email, Chat, Messaging Session, or Voice Call. Channels you have already set up appear under Active channels with a Configured label, along with Configure and Disable buttons.
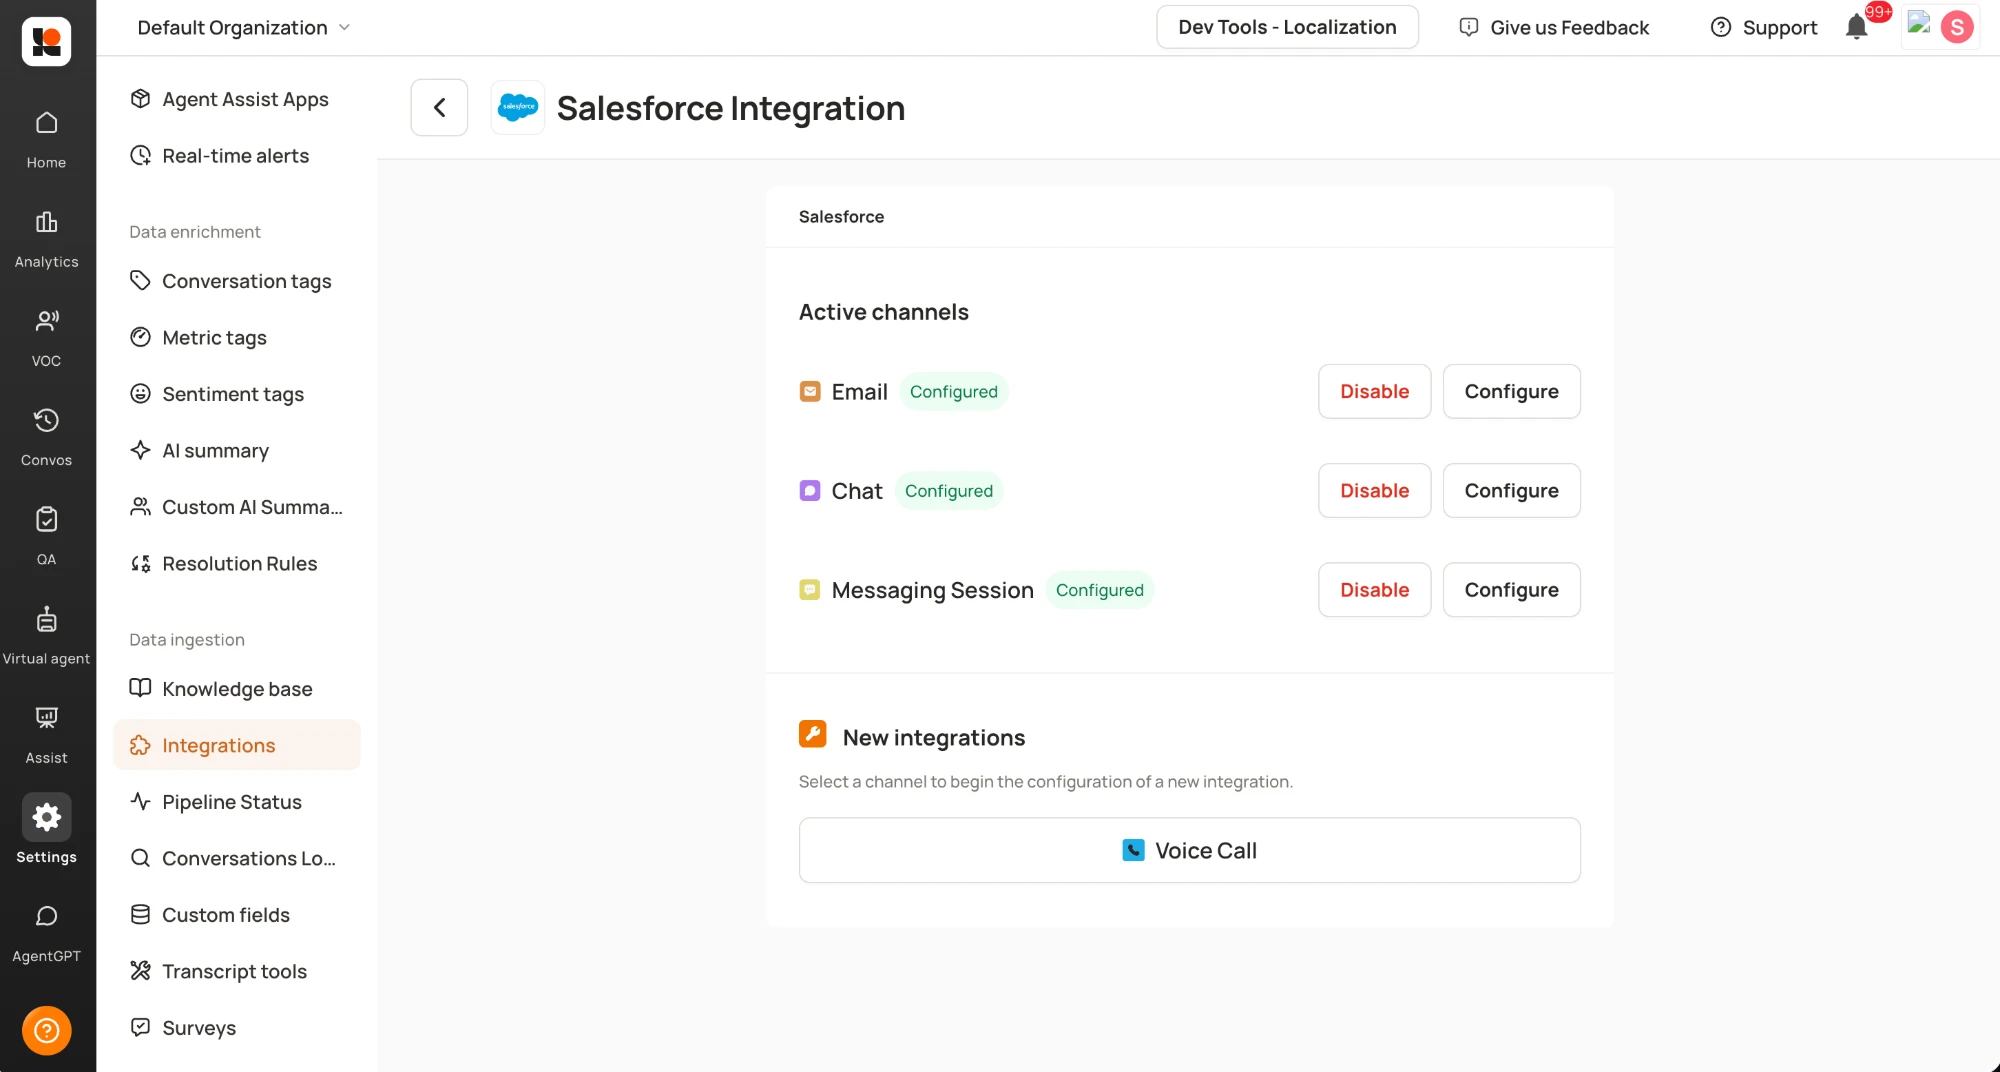
Each channel is set up with the same three-step flow: Configurations, Import sample, and Review & Enable.
Step 3: Configurations
On the Configurations step, set how conversations for this channel are imported. The fields shown depend on the channel. Leave a field empty to use the default.
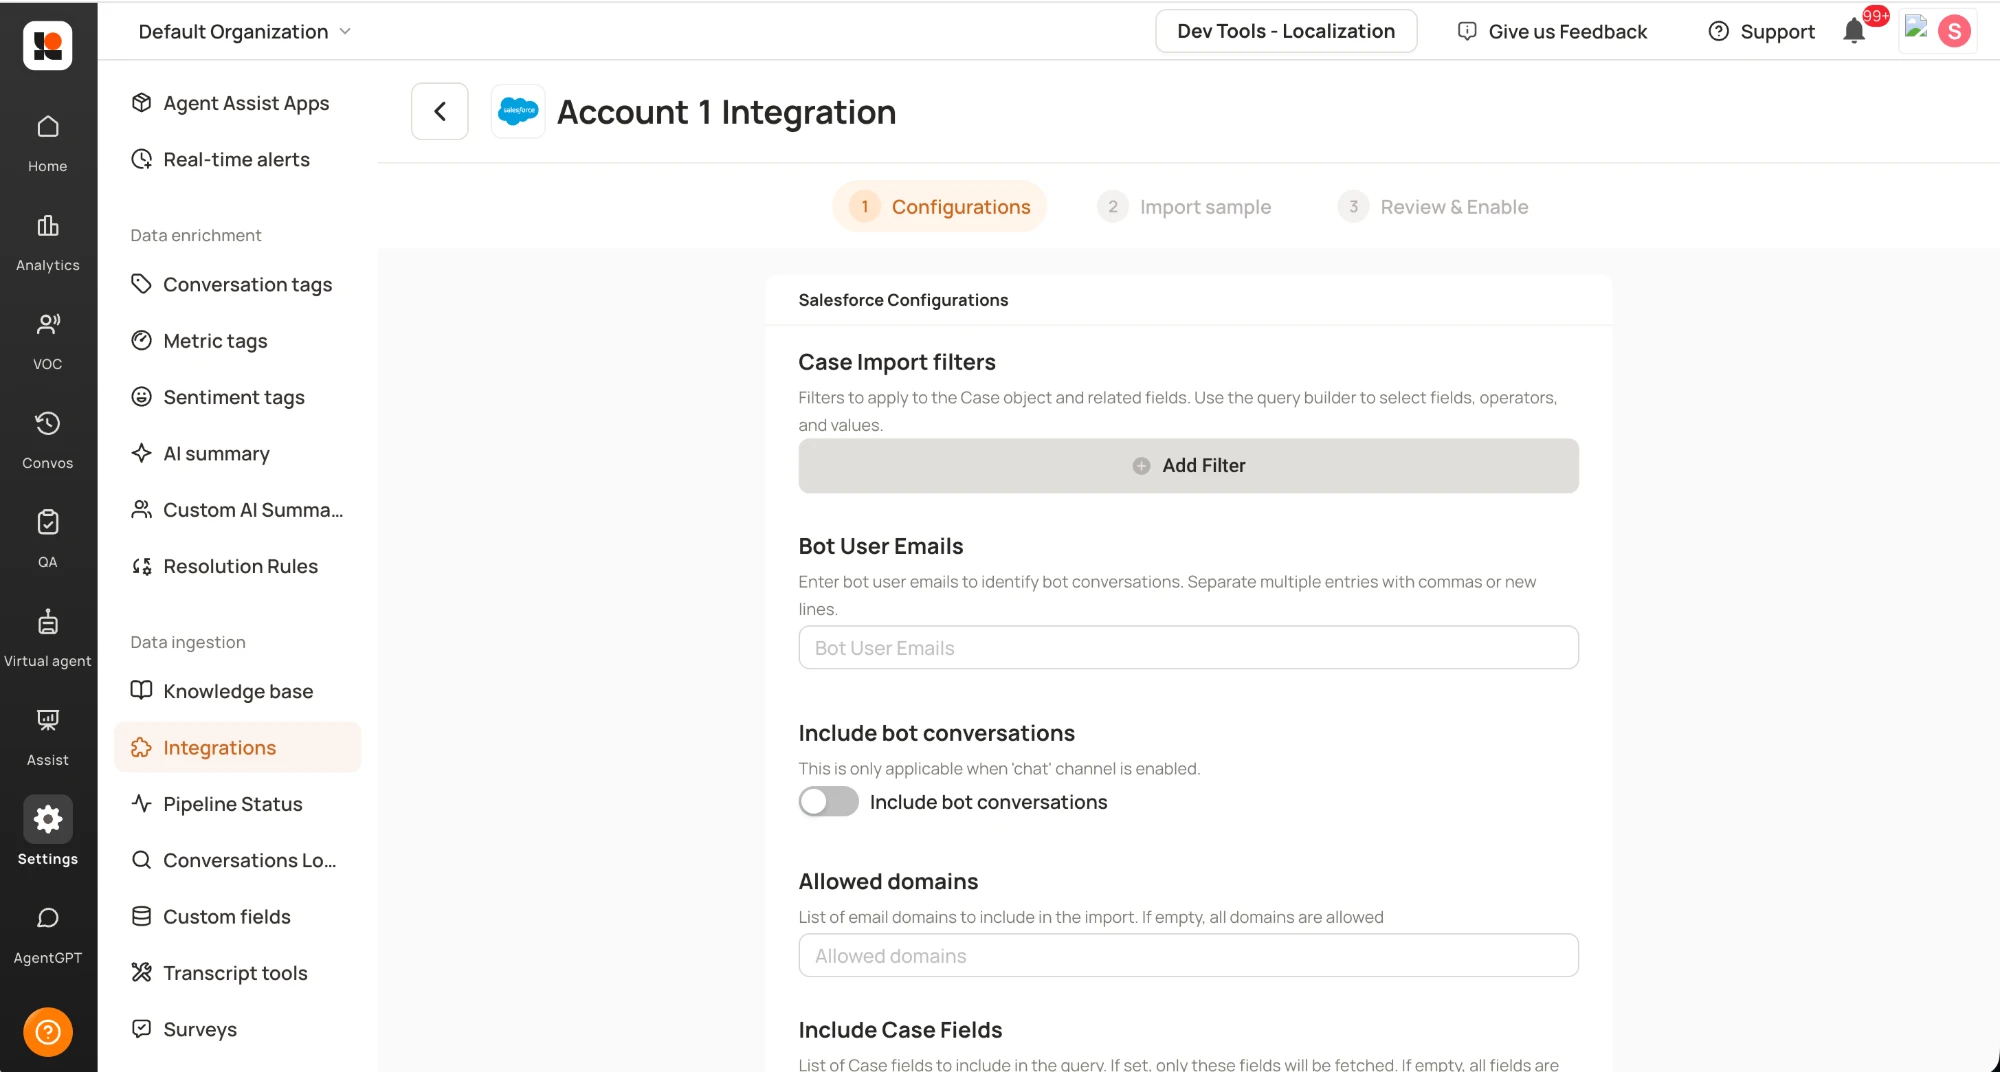
Case Import filters: filters on the Case object and related fields. Select Add Filter and use the query builder to pick fields, operators, and values.
Bot User Emails: emails of bot users, used to identify bot conversations. Separate multiple entries with commas or new lines.
Include bot conversations: turn on to import bot conversations. Applies only to the Chat channel.
Allowed domains: email domains to include in the import. If empty, all domains are allowed.
Include / Exclude Case Fields: Case fields to fetch. If Include is set, only those fields are fetched.
Include / Exclude LiveChatTranscript Fields (Chat): LiveChatTranscript fields to fetch. Include overrides the defaults. Protected fields (Id, Body, StartTime, LastModifiedDate) cannot be excluded.
Supported languages field: turn on Enable non-english language translation and select the Case field that holds language codes or language names, used for language detection.
Case Field Mapping: select the field (foreign key) that links the conversation, for example a Chat, to its Salesforce Case.
Redaction & Dictionary: select Manage in settings to choose which types of data are redacted or treated differently in records and transcripts.
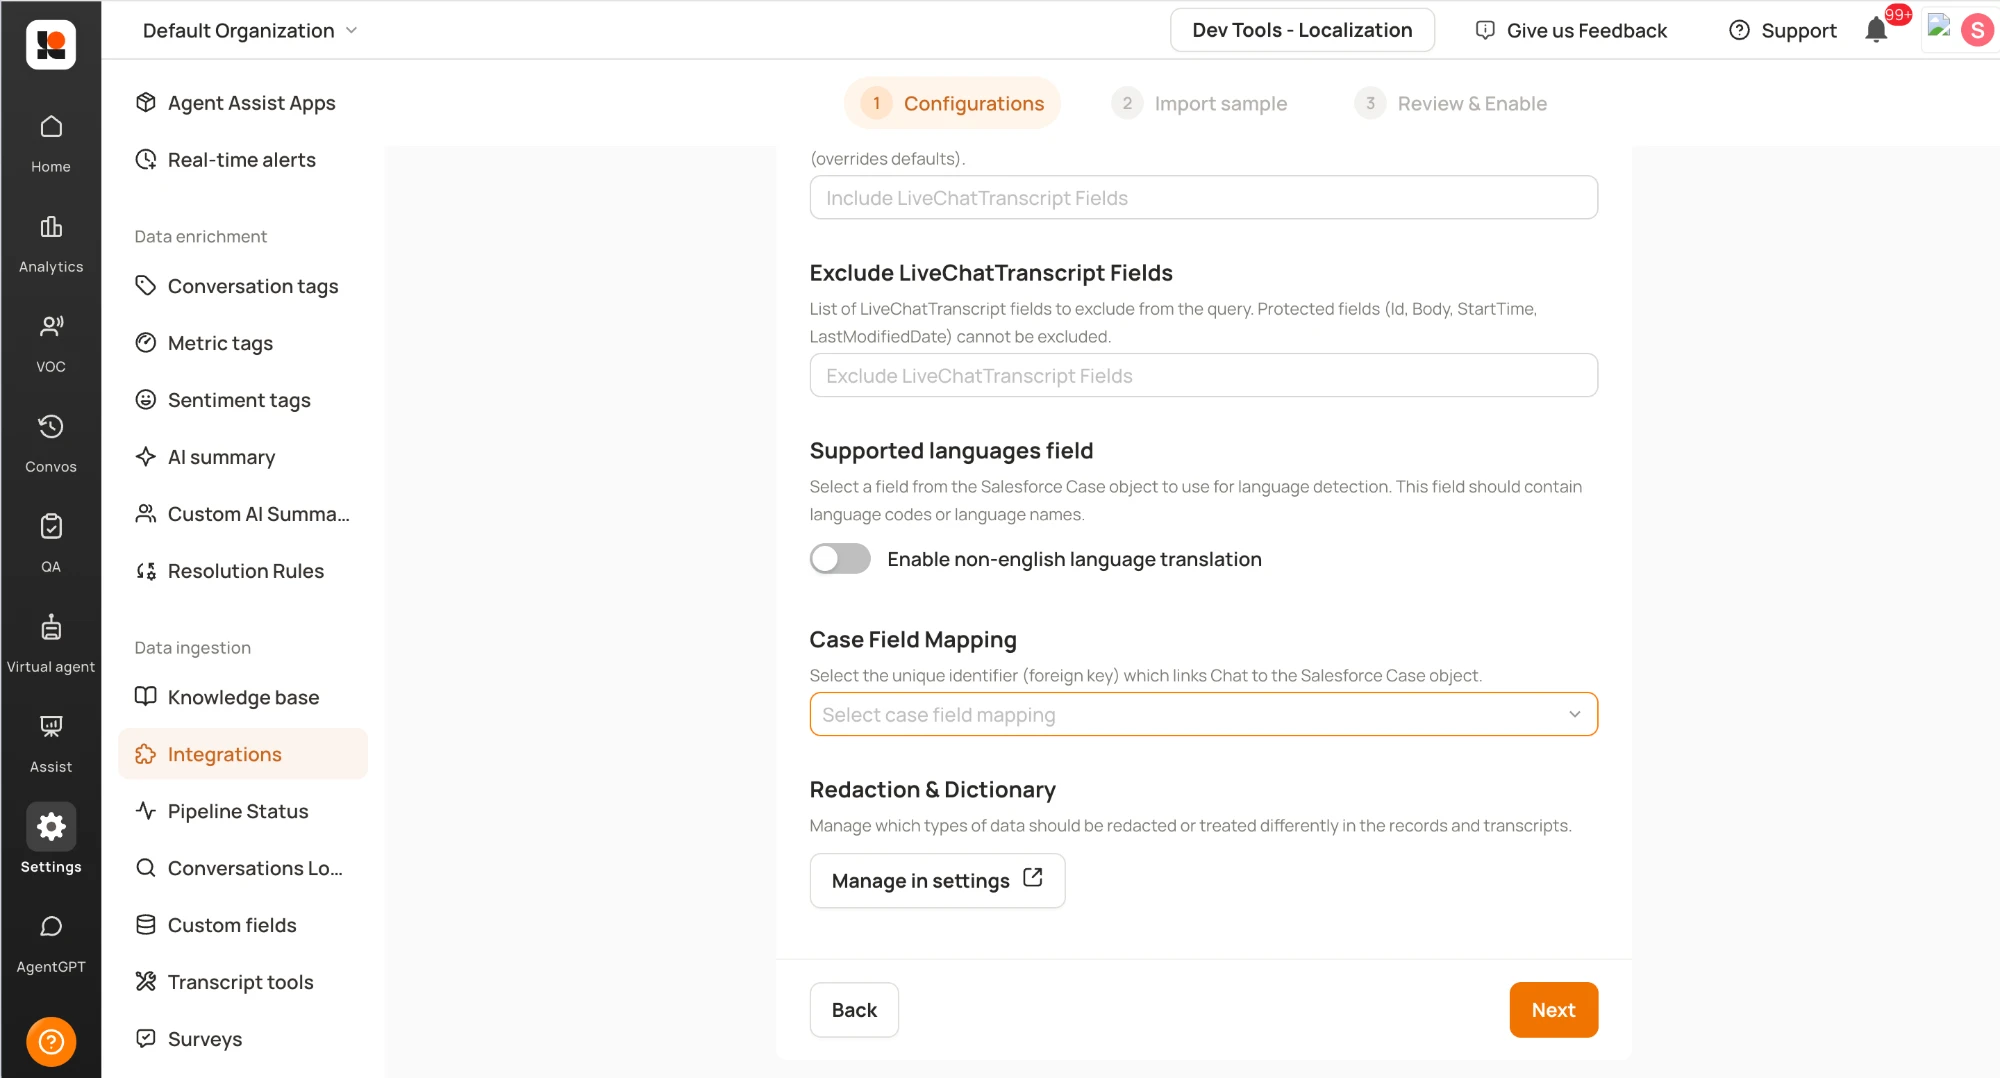
Select Next to continue.
Step 4: Import sample
Import a small set of conversations to check the configuration before enabling the full import.
Select a timeframe: Last 6 hours, Last 12 hours, or Last 24 hours. We recommend 100–200 conversations, so pick a timeframe that will include enough of them.
Tick I have verified all configurations.
Select Import sample. To skip the sample import, select Skip.
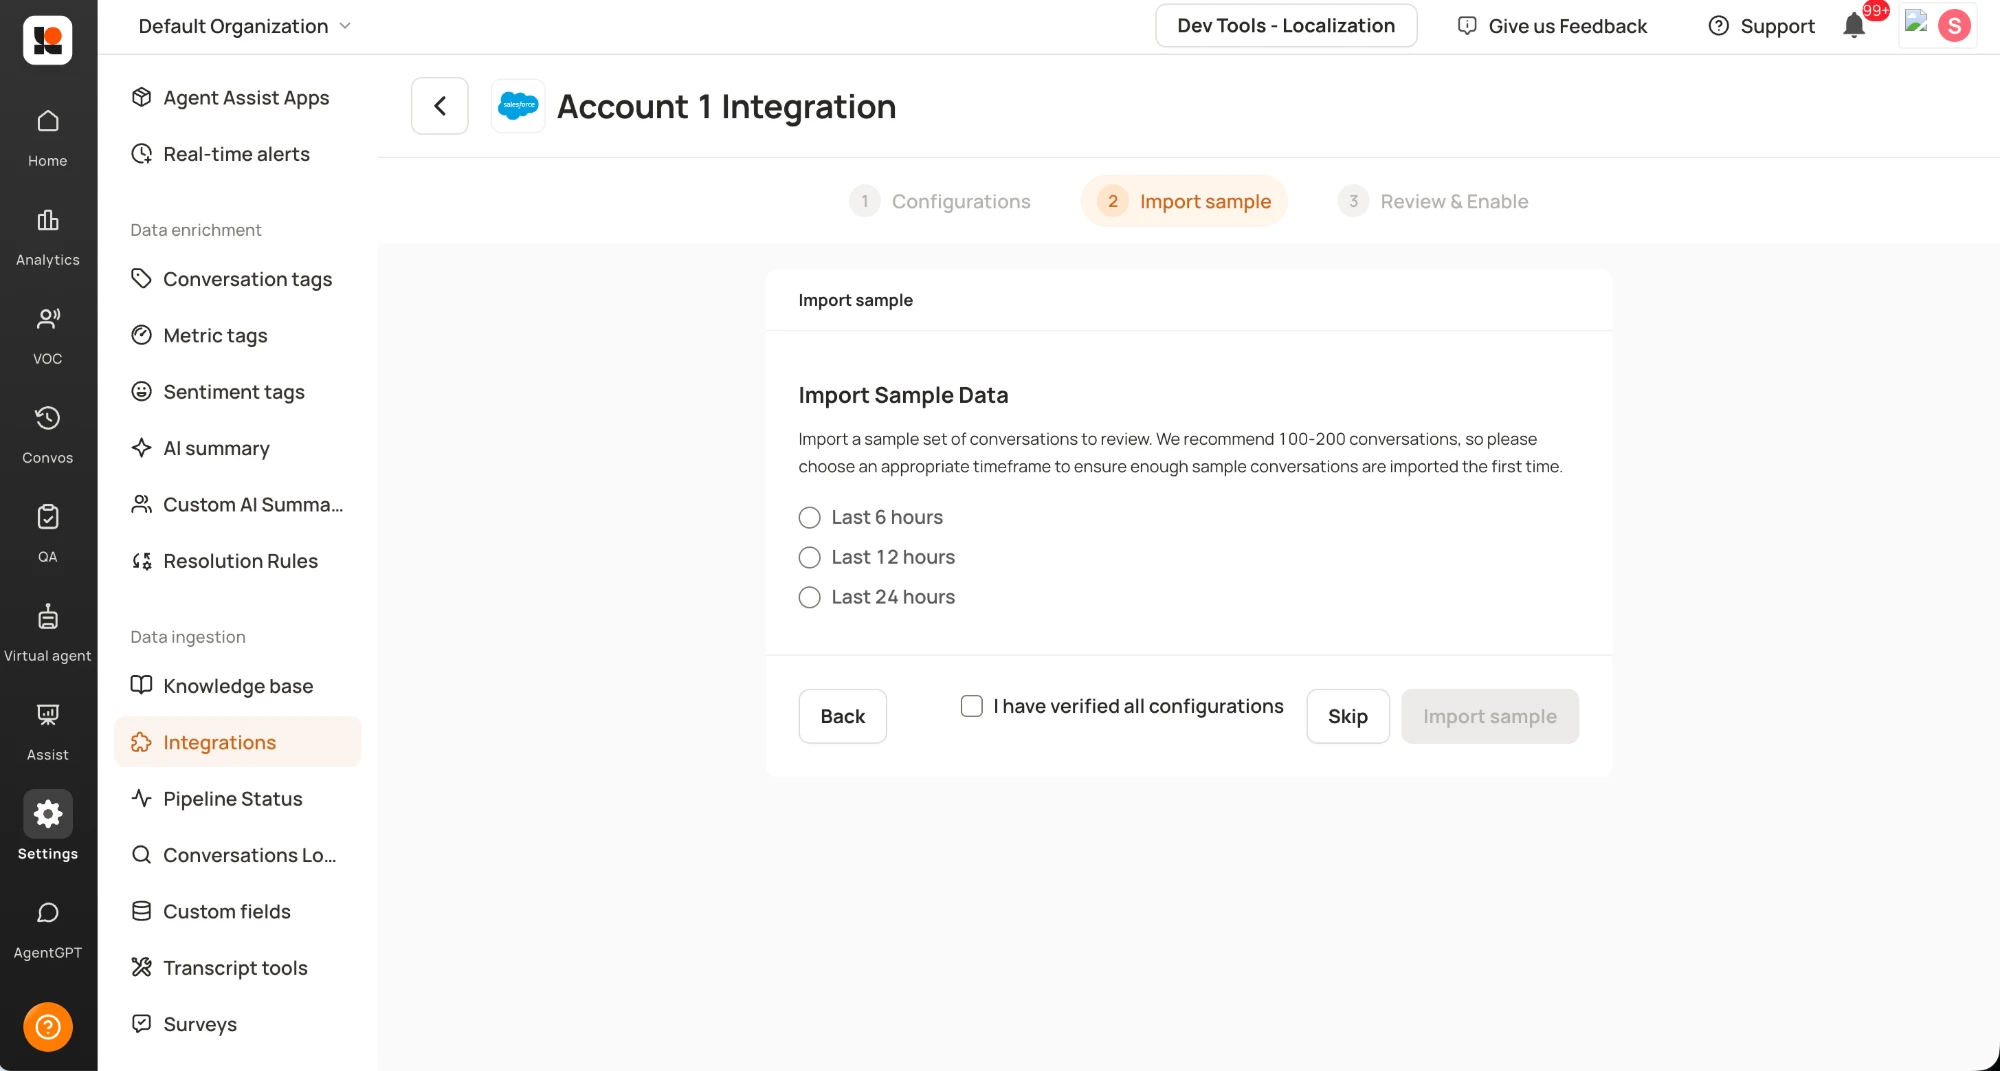
Step 5: Review & Enable
The sample import runs in the background. After about 2 hours, open the Conversations tab and review the imported conversations.
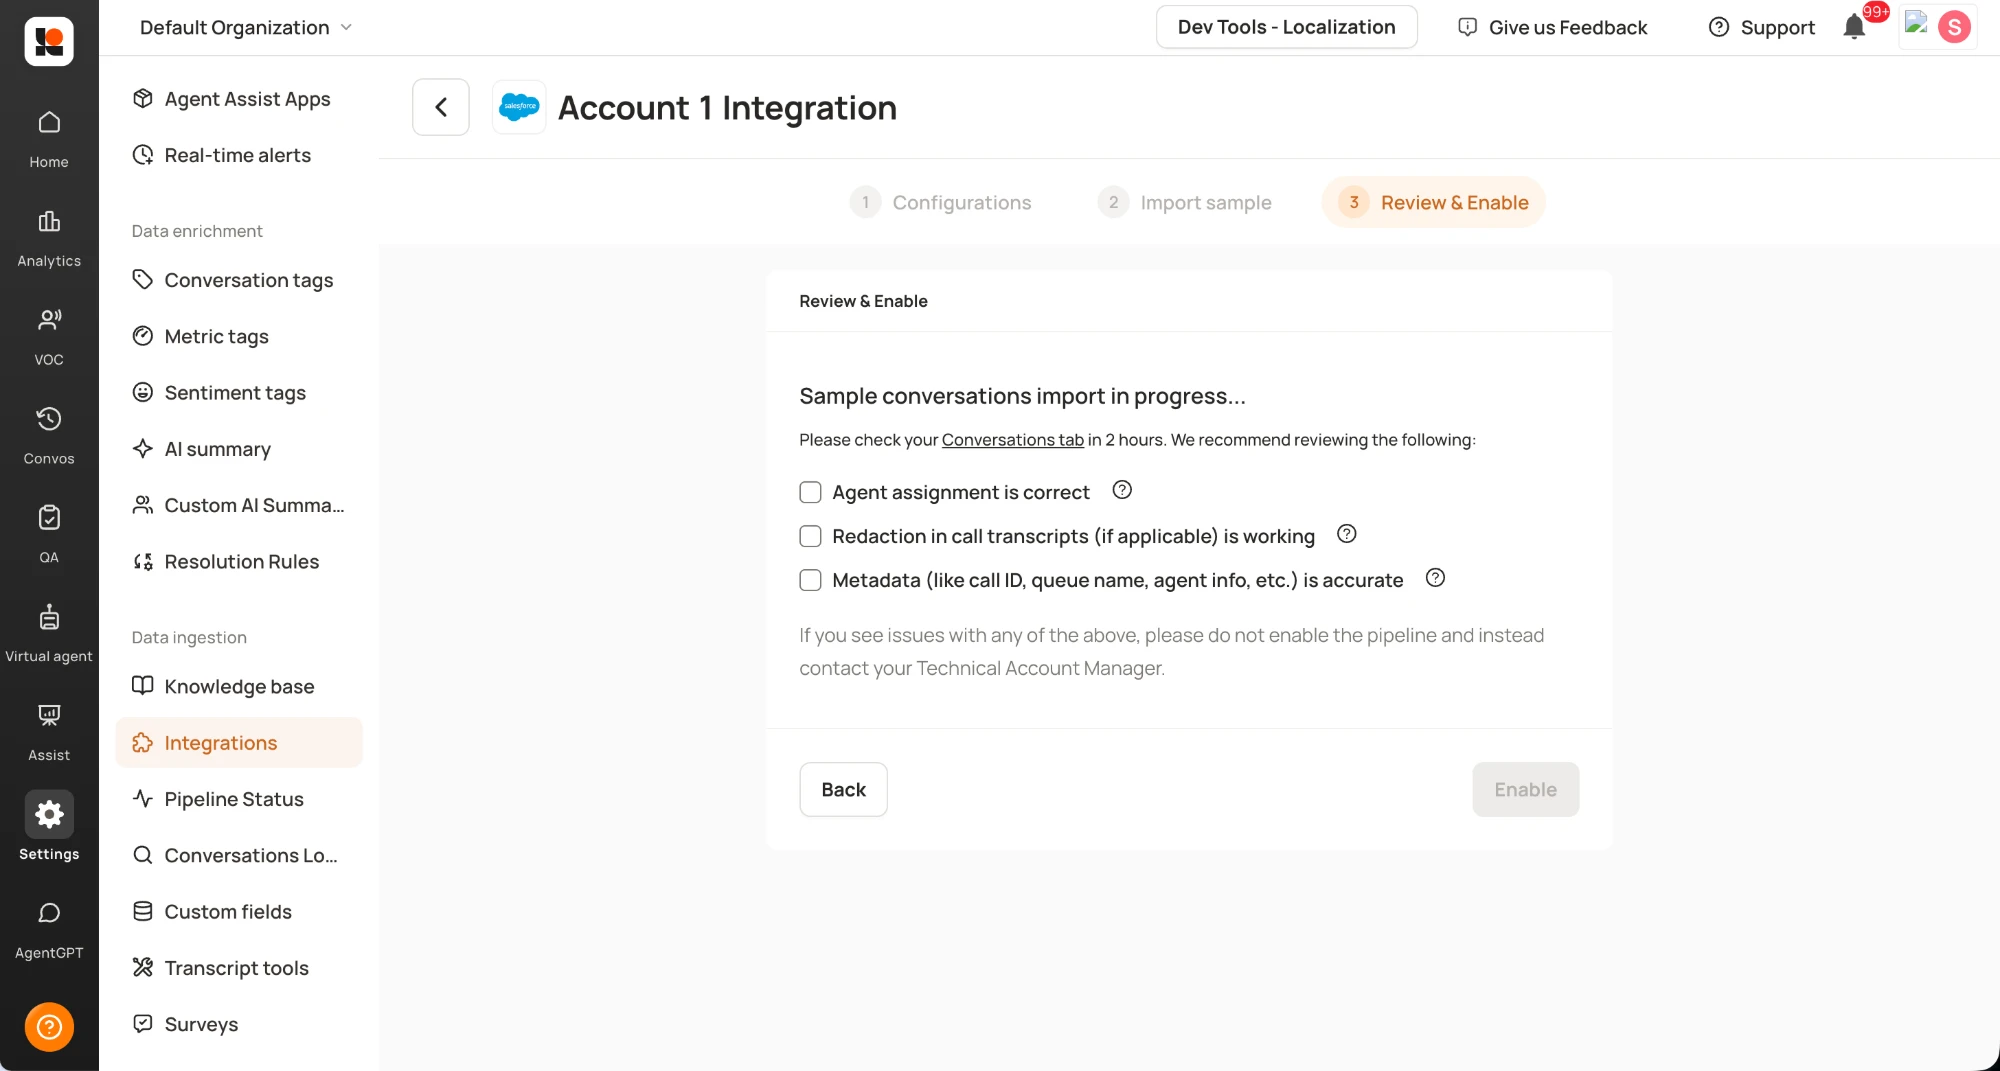
Confirm each item and tick its checkbox:
Agent assignment is correct
Redaction in call transcripts (if applicable) is working
Metadata (like call ID, queue name, agent info, etc.) is accurate
Once all three are ticked, select Enable.
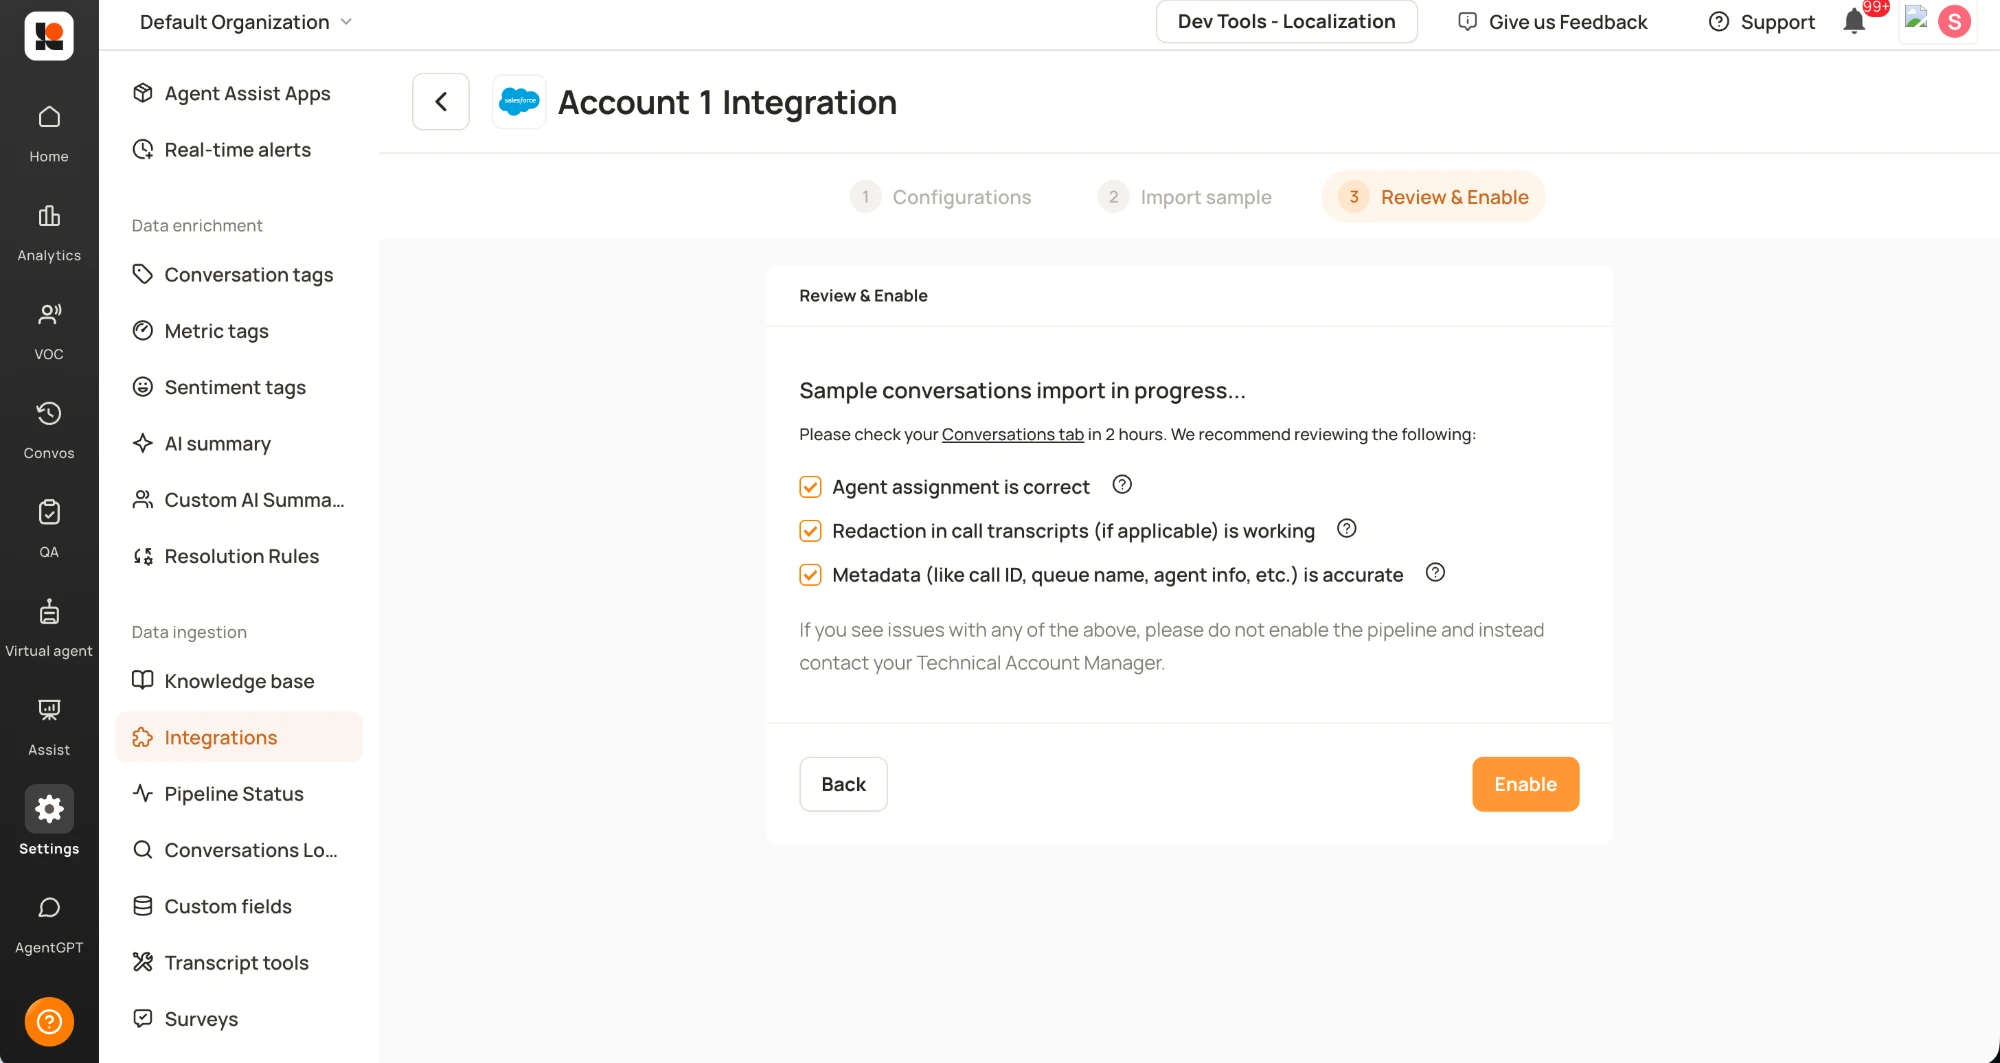
WARNING
If you see issues with any of the above, do not enable the pipeline. Contact your Technical Account Manager instead.
After you enable it, the account moves to Enabled Accounts and syncs data automatically.
Managing Salesforce accounts
Go to Settings > Integrations and select the Salesforce card to open Salesforce Account Management. It lists:
Enabled Accounts: accounts that are configured and syncing data automatically.
Connected Accounts: accounts that are connected but not yet fully configured. Select one to complete its setup.
Select the More options (⋮) button next to an account to manage it.
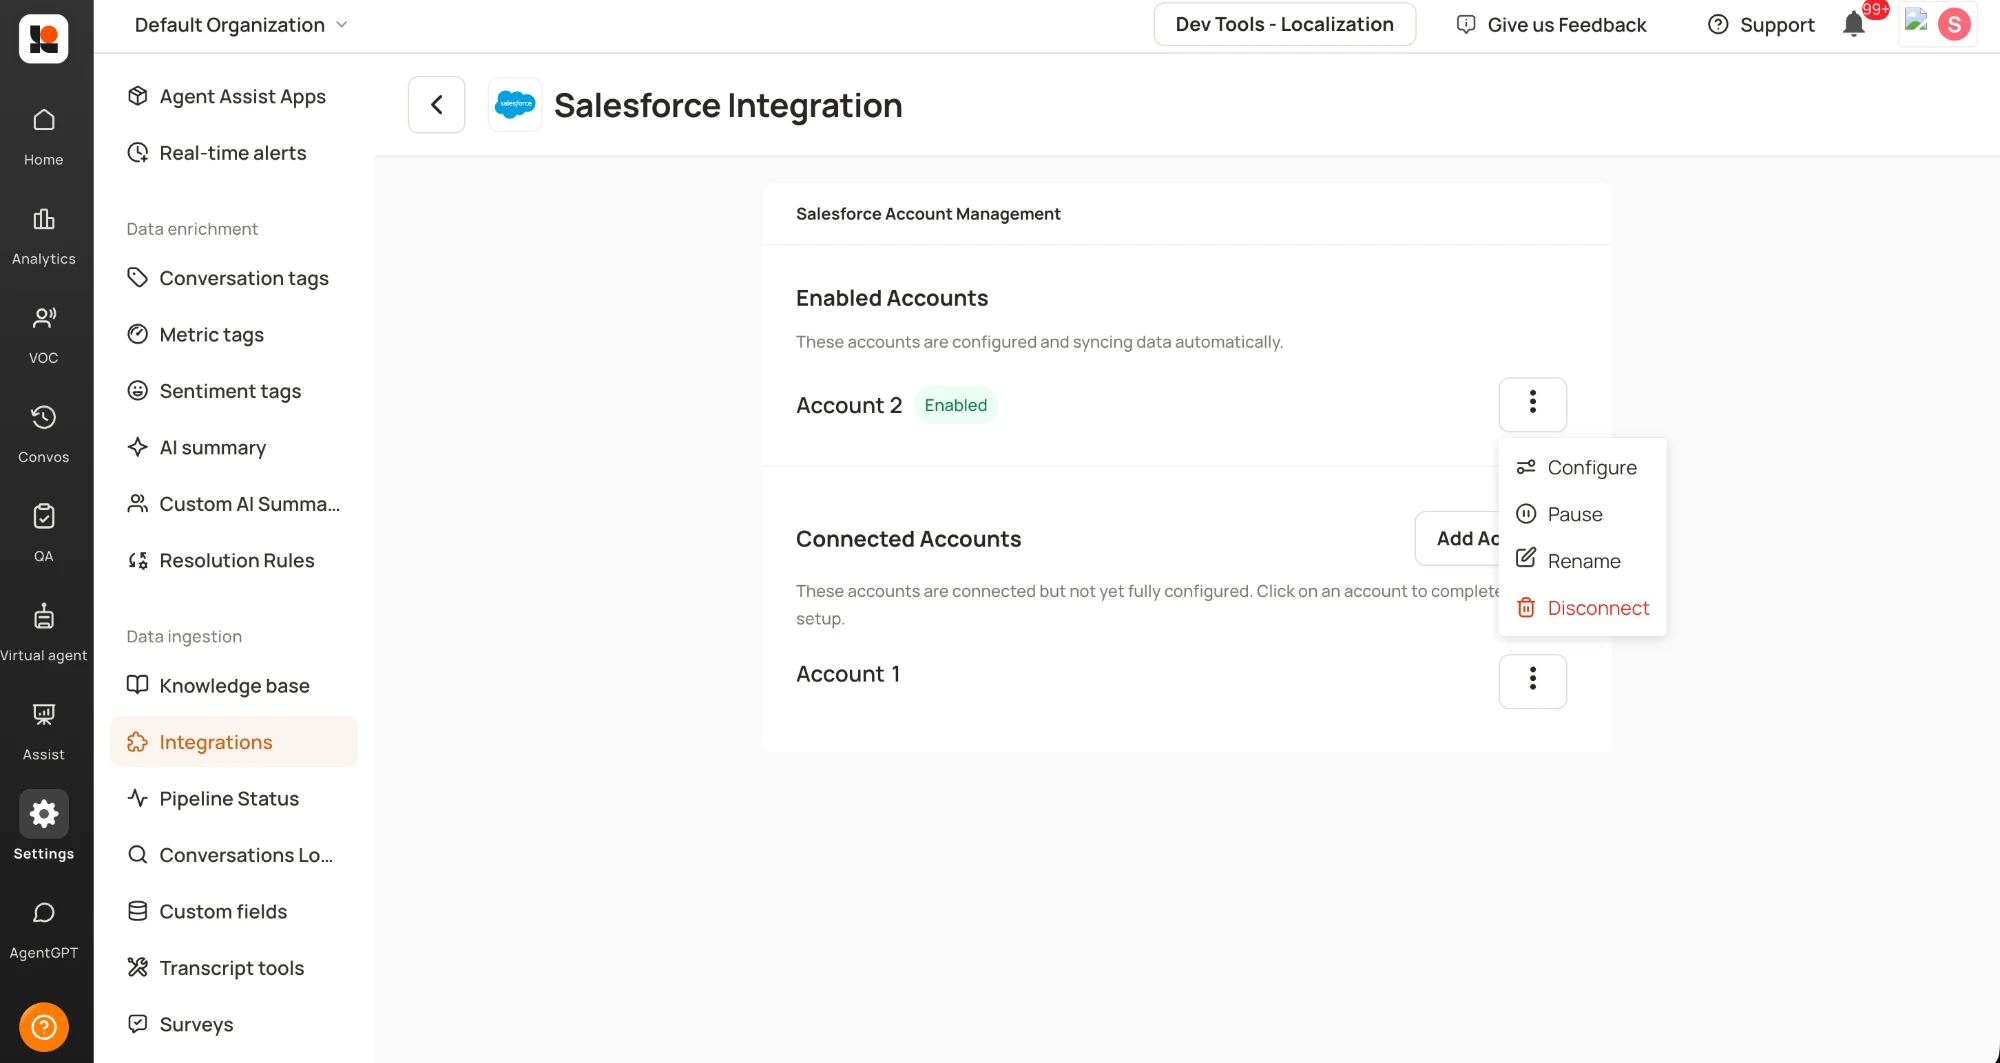
Configure: opens the account's channels so you can change configurations or add a channel.
Pause: temporarily stops data ingestion for the account. To stop a single channel instead, select Configure and then Disable next to that channel.
Rename: changes the account's display name, for example to tell several Salesforce orgs apart.
Disconnect: removes the account's connection to Level AI.
Pausing data ingestion
Open Salesforce Account Management.
Under Enabled Accounts, select More options (⋮) next to the account.
Select Pause. Ingestion stops until you resume it.
Renaming an account
Select More options (⋮) next to the account.
Select Rename, enter the new name, and save.
Disconnecting an account
WARNING
Disconnecting removes the authentication between Level AI and this Salesforce account. All ongoing and scheduled data ingestion for the account stops until you connect it again.
Select More options (⋮) next to the account.
Select Disconnect and confirm.
HELP & SUPPORT
For any help related to the integration, reach out to us at support@thelevel.ai.